

[ESP32 ZigBee Gateway] Tutorial 1 – Simple Esp32 Zigbee Gateway Connect Xiaomi Sensor
Hello everyone!
In this article, I will guide you to use esp32 which connect to zigbee to receive on-off data from xiaomi's door sensor.
I. DEVICE CONNECTING
- Zigbee Module E18-MS1PA1-IPX (ZigBee Shield)
- Jumper
- Xiaomi sensors (Door sensor)
- Light and wire
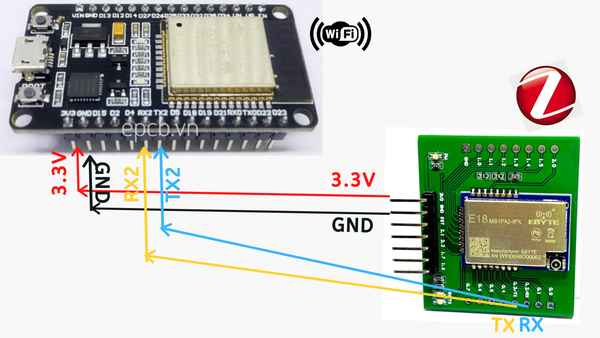
You should notice that I enable UART2 pin on ESP32 so we will use RX2 pin, TX2 pin on the board. Then connect in RX - TX, TX - RX style as the above table.
| ESP32-DevKitC WROOM | ZigBee Shield |
| 3.3V | 3.3V |
| GND | GND |
| RX2 | TX |
| TX2 | RX |
For Relay, because ESP32 only uses 3.3VDC voltage so it will not be enough to trigger Relay. I use 5VDC external voltage for Relay, you connect as follows:
DC+: 5VDC (external voltage)
DC-: GND (ESP32 - common foot)
IN: D4 (ESP32 - Signal foot)
II. UPLOAD CODE AND JOIN SENSORS
Step 1: import your .zip library: https://github.com/epcbtech/ArduinoZigBee, if you are not familiar, you can refer to how to import libraries here.
Step 2: Download sample code Sample_ZigBee_ESP32_Gateway, build and load code for the ESP32 board.
* If you do not know how to setup the ESP32 board for the first time on the Arduino IDE, refer here
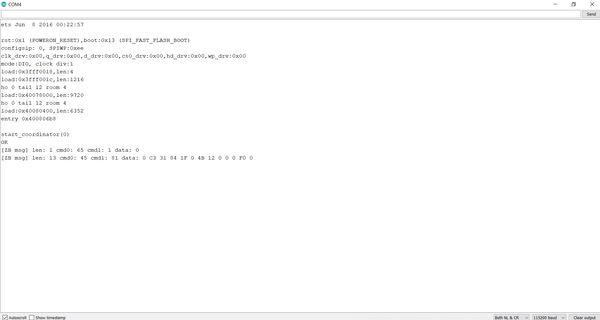
Step 3: Open the serial / minicom of the IDE, select the baud rate 115200, reset the board and wait for a while for the Gateway to start, when the serial / minicom says "OK" is ok, then press the 1 key on the keyboard to allow connect the sensor to the network, otherwise if serial says "NG" so you have to reset the board to return to the default configuration.
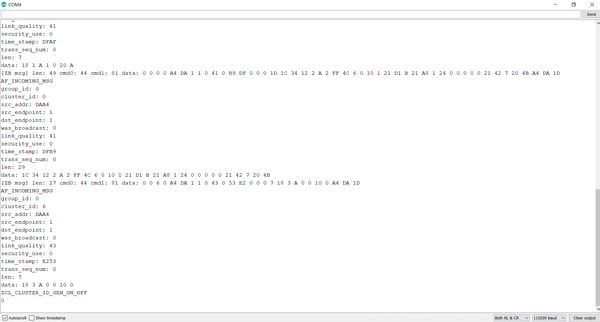
Step 4: At the door sensor, hold down the reset button on the sensor until the sensor light blinks continuously, wait for a while for the sensor to connect to the Gateway is done!
I hope this blog will help you. If you have any questions, please message me via Fanpage: EPCB or via Email: epcbtech@gmail.com. I wish you succcess!
Comment facebook