

[Arduino ZigBee Shield] Post 2: Communication Arduino Board Through ZigBee Shield
♥️Hello my friends ♥️
In the previous post, I just introduce about post: Automatic System With Xiaomi Door Sensor And Arduino Zigbee Gateway This post introduce about you how to setup a basic automatic system.
Today, I'll introduce a special and exciting function of Arduino ZigBee Shield, this shield help Arduino Board communication with them through ZigBee wave. I'll demo Paring Route function with Gateway and Push Data funtion from Router to Gateway and vice versa.
First, you could prepare:
Then download Arduino IDE. After setup sucessfully IDE, you import .zip library of EPCB here: https://github.com/epcbtech/ArduinoZigBee.
After import library, you download samlpe code SmartZigbeeNetWork, then upload code for each Arduino ZigBee Shield.
After upload code done, you connect Router to network of Gateway:
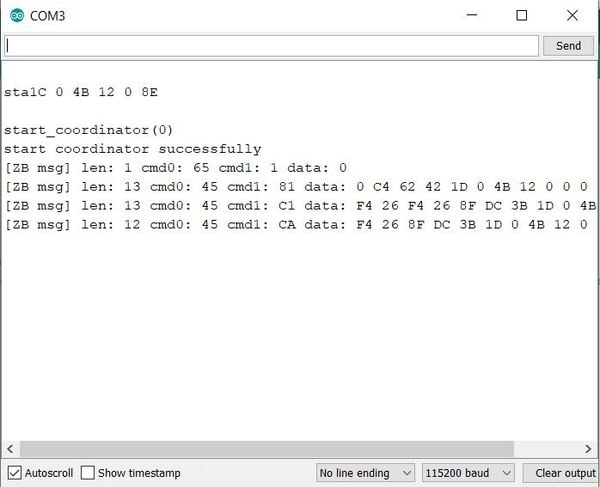
- Open serial/minicom monitor of IDE, select baud rate 115200, wait a moment to Gateway permit booting, when serial/minicom show "start coordinator successfully" is okay, then press case '1' to permit Router joining to the network, opposite if show "start coordinator error" then you reset board and do it again until monitor show "start coordinator successfully". Gateway will spend 60s to allow Router to join the network. If there is no router involved, the Gateway will return to normal working mode. Users must request again if they want to connect the Router again.
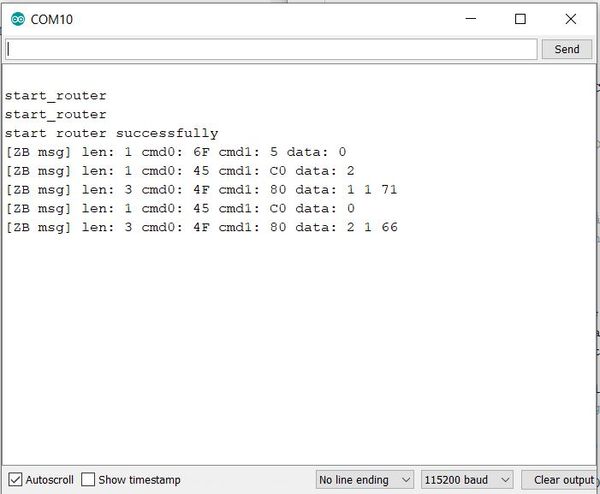
- Open serial/minicom monitor of IDE, select baud rate 115200 and wait a moment to Router permit booting, after successfully boot, the monitor will display the following:
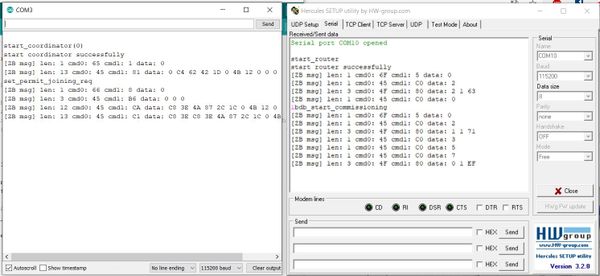
- Open serial/minicom monitor of Router, send case '1' to permit Router join to Gateway network. For Router, you also send the case '1' to start connect Gateway. After the router has connected successfully, the serial/minicom monitor will show:
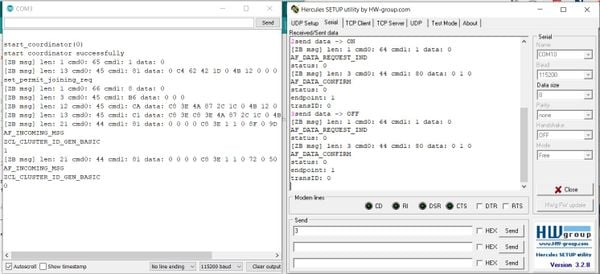
- I build 2 data test ON/OFF to send Router, first, I send case '2' - corresponding ON(1) value from Router to Gateway:
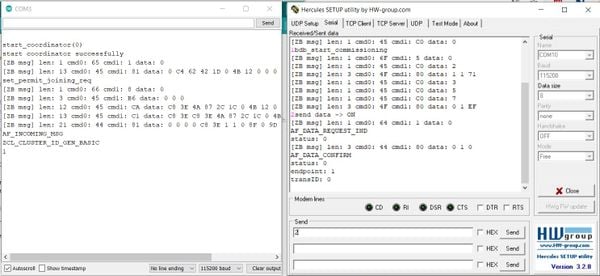
- I continue send case '3' - corresponding OFF(0) value from Router to Gateway:
- You can self build data you want to send in the source code of the Router in many different cases to your liking by customizing the code.
- After the Router send data to the Gateway, it will save the ''short address" of the Router and use this address to send the data back. You can also customize the data you want to send to the Router.
So, you can demo the Paring function and send data between 2 Arduino boards to the ZigBee Network. In addition, the source sample also has detailed instructions, making it easy for you to customize the function as desired. The library and sample source code will give you easier access to ZigBee technology and generate interest in product development.
Note: Because I demo Arduino IDE on Windows OS, so I will not open 2 serial monitors simultaneously, please download Hercules Software to be able to open simutaneously. For Arduino IDE on GNU/Linux, please refer to the Console With Minicom Tool.
I hope this blog will help you. If you have any questions, please message me via Fanpage: EPCB or via Email: epcbtech@gmail.com. I wish you succcess!
Comment facebook